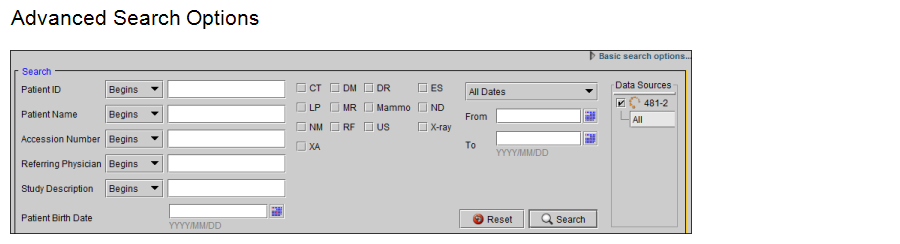
Advanced Searching
Use the advanced search options to create complex, refined searches. You can use the basic search filters, as well as create custom date ranges and perform more complex study filtering.
When you use the advanced search options, the search window contains the following sections.
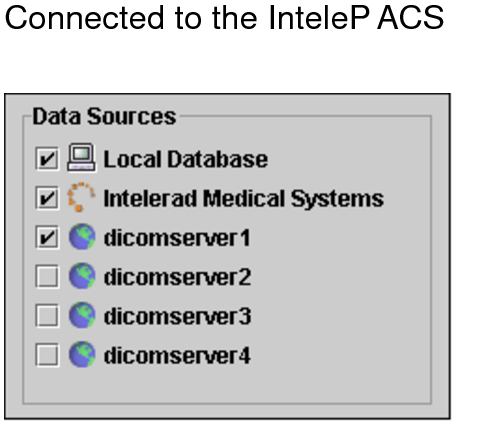
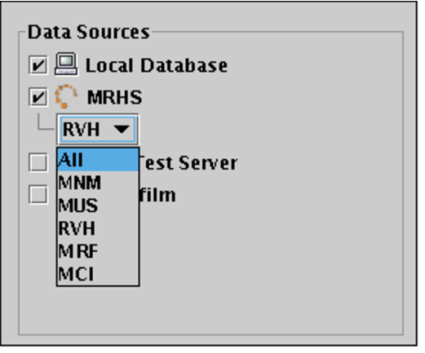
Data Sources listAllows you to select which locations to search. The list of sources available depends on the list of DICOM servers you configured in the DICOM preferences. If you have access to multiple organization codes, they also appear here.
You either must have access to the DICOM Query feature or have access to multiple organization codes for the Data Sources list to appear.
Modality filtersFilters studies based on the type of scanner used to acquire images.
Date filtersAllow you to search for studies acquired on a particular date, or within a range of dates.
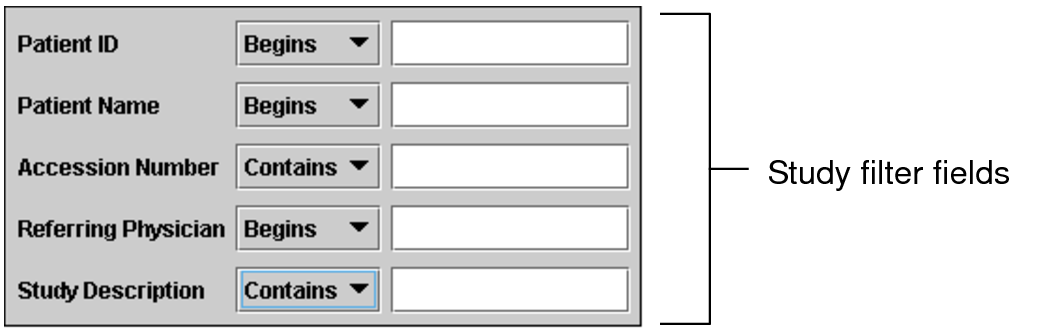
Search filtersSearch based on various information related to the study, such as the name of the referring physician, study description, alternate patient ID (or NHS, RAMQ, OHIP numbers) or accession number.
If you search for studies by alternate patient ID, your search will not return studies stored on your local database or on your DICOM servers.You can only use the alternate patient ID to search for studies on IntelePACS.
Study listDisplays the studies found in the database that match your search filter settings.
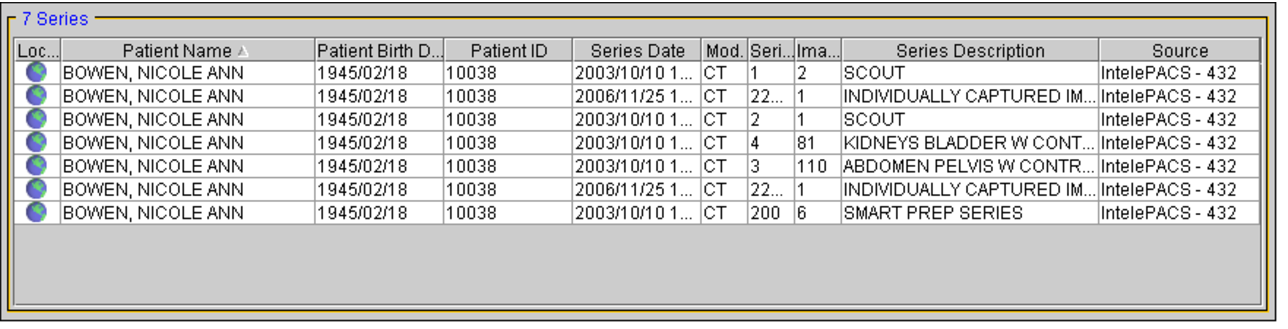
Series listDisplays all series in the selected study.
To use advanced search:
-
Do one of the following:
- From the InteleViewer main menu, choose File | Search Tool.
- Click the Search tab.
- If you have access to the Teaching Cases feature, click the Teaching Case tab.
-
If the basic search options appear, click Advanced Search Options in the top right corner of the Search tool.

-
If the DICOM Query feature is enabled, or if you have access to multiple organizations, select any or all data sources you would like to search. If you do not have access to this feature, the Data Sources list does not appear.
You must select at least one source.
If you have not already defined DICOM servers to appear in the Data Sources list, see DICOM Preferences for information on how to do so.
If you connected to the IntelePACS when you logged in, you will see the IntelePACS server listed as one of the available servers.
-
Specify the date on which the study was acquired. Do one of the following:
Do this:
Description:
Choose a date or range of dates from the Date list.
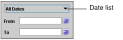
To limit the number of search results, you must choose an option other than All Dates from the Date list, or use at least one other search filter. Otherwise, an error message appears.
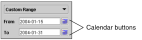
Specify a custom date by entering the earliest date in the From field and the most recent in the To field, in the form of: YYYY-MM-DD. Or click the Calendar buttons and use the calendar to choose the required dates.
-
If your facility contains multiple organization codes, choose one from the Organization list, or choose All.
If the DICOM Query feature is enabled, or you have access to multiple organizations, the Organization list appears in the Data Sources list.
This filter is only available if you chose to connect to the IntelePACS when you logged in.
-
Select one or more modality filters.

If you do not select any modality filters, studies from all modalities will be displayed.
-
To use the study filters, enter the text to search for in the corresponding study filter field, and then select Begins, Contains, or Equals.
Select:
To search for:
Begins
Study information that begins with the specified text.
Contains
Study information that contains the specified text anywhere.
Equals
Study information that matches all text exactly as specified. Note that this option is only applied for the Patient ID field or when the selected data source is a DICOM server. For all other fields, this operation acts like the Begins operation.
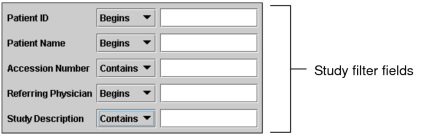
For example, to find studies based on a particular accession number, enable Begins and enter the first few digits of the number in the Accession Number field.
-
To search by the patient's date of birth, do one of the following:
- Type the year, month and day corresponding to the patient's date of birth (YYYY-MM-DD).
- Select the date of birth from the calendar.
-
Click Search.
Depending on your IntelePACS configuration, you may receive an error message because your search filtering was not specific enough. When using the Referring Physician, Study or Series Description, or Requested Procedure ID filter, you may need to make your search more specific by using one of these filters: Patient ID, Patient Name, or Accession Number. You can also use a Date Filter.
All studies that match the criteria you specified appear in the Study list. It may take a few moments for the search results to appear, depending on the amount of data being transferred.
-
To list the series, click a study in the Study list.
The series appear in the Series list below.
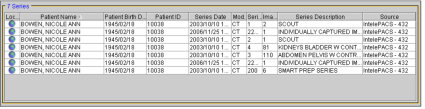
Icons in the Location column indicate where the images are located. Images can be located on the server (remote), on your local workstation (local), or both. The following icons are used to indicate the location of the study or series.
Location Icon:
Indicates:

Images are located on your workstation only.

Images are located on a remote server only (can be a DICOM server or IntelePACS).

Images are located on both a remote server and your workstation.


See Also