Changing the Viewport Layout
The viewport layout controls the way multiple series, and the images within each series, are displayed on the screen. When you open images, the initial viewport layout is determined by your user preference settings or layout protocols. However, you can change the layout as you work.
Changing the viewport layout modifies the view for either your current monitor alone, or for all monitors on your workstation, depending on the option you have selected in your user preferences.
If you reopen the series, or open a different series, the default layout is applied and will again be determined by your user preference settings or protocols (if your IntelePACS is configured with advanced layout management).
You can change the viewport layout for the current monitor or across all monitors by using one of the following methods:
Keyboard shortcutsControl how the image and series layout will appear on the current monitor.
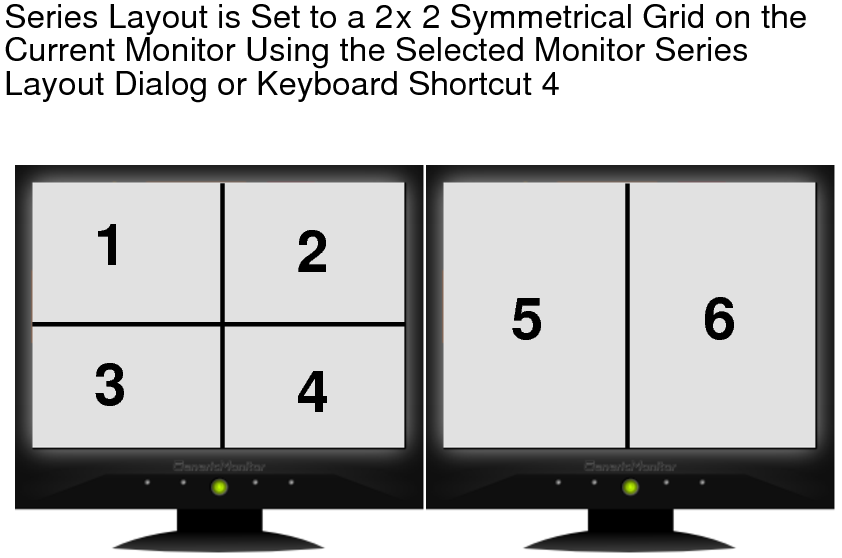
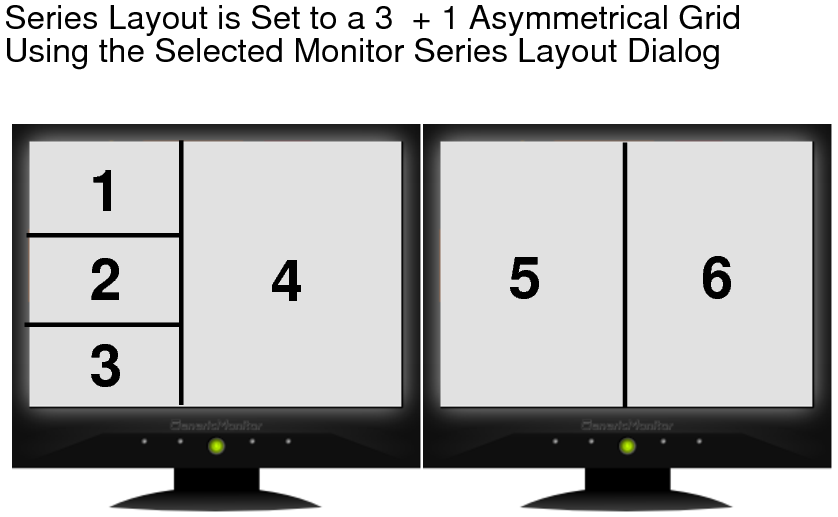
Selected Monitor Series Layout dialogControls how the series layout will appear on the current monitor. This method is useful if you want to set a different number of viewports and layouts on individual monitors.
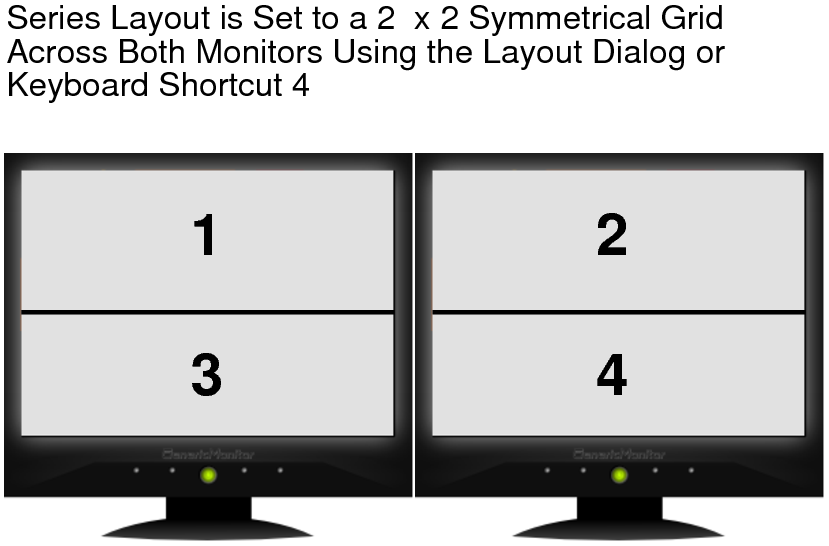
Layout dialogControls how the image and series layout will appear across all screens.
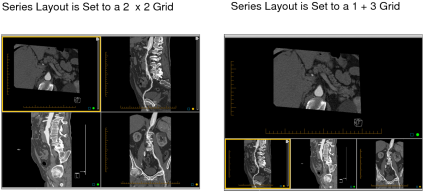
Here are several examples of a dual-monitor configuration using the above methods.
When you use the keyboard shortcuts, InteleViewer takes the aspect ratio of the application window on the current monitor into account and adjusts the series and image layout to best fit the viewing area. For example, if you use the keyboard shortcut for a four-series layout (4), the series will be displayed either 1 x 4, 2 x 2, or 4 x 1, depending on the shape and size of the InteleViewer window.
You can also use the mouse to quickly switch from whatever your current layout is to a single-viewport layout, as described below.
To quickly set a 1-viewport layout:
-
Double-click a series or image viewport.
The series/image is displayed in a 1 x 1 layout in the monitor.
-
To revert to the previous layout, double-click the series/image again.
If you replace the series in the 1-viewport layout with another series, InteleViewer will either restore the original series or show the current series when returning to the multi-viewport layout, depending on your user interface preferences. For more information, refer to the “When Returning To a Multi-Viewport Layout From a 1-Viewport Layout Opened By Double-Clicking” option in User Interface Preferences. If you stack images in the 1-viewport layout, the currently displayed image is shown when returning to the multi-viewport layout.
To change the series layout:
- Keep your monitor configuration in mind when choosing a layout. For example, if you are using a dual-monitor system, choose a layout with an even number of columns to split images evenly across the two screens.
- To change the series layout across all monitors, click the Series Layout tool
 in the toolbar or the Global Monitor Layout tool
  in the radial menu.
 - Click Series Layout.
- Click the required layout icon. The icons indicate the way in which multiple series will appear on screen, organized in rows and columns.
- Click OK.
-
To change the series layout on the current monitor, right-click a viewport and then click the Current Monitory Layout tool
 in the radial menu.
-
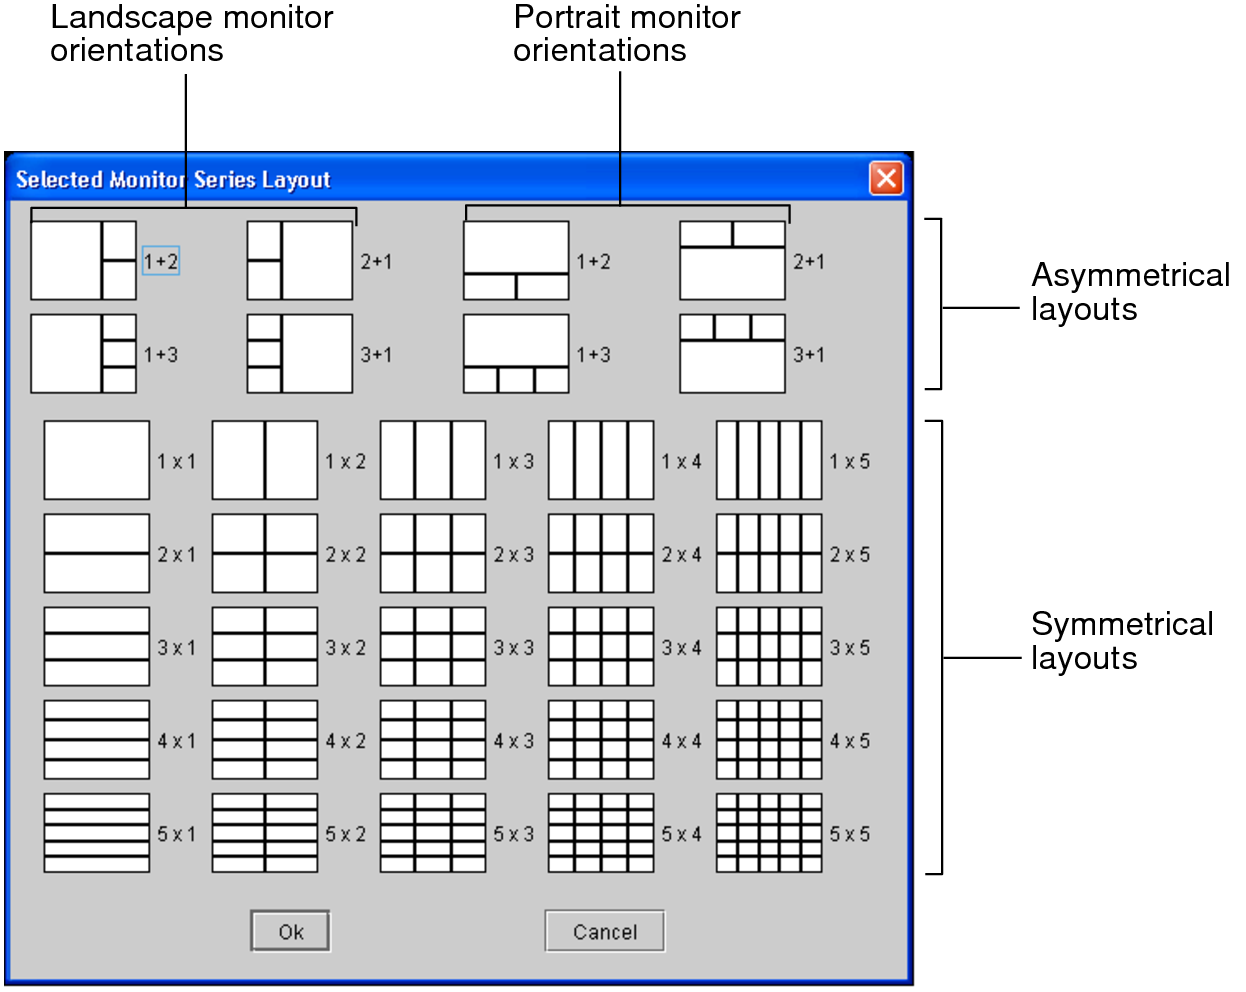
Click the required layout icon. In a multiple-monitor configuration, the Selected Monitor Series Layout dialog controls how the series will appear only on the current monitor.
For the asymmetrical series layouts, keep in mind that there are four layout icons for a portrait monitor orientation, and four layout icons for a landscape monitor orientation. For example, a 3 + 1 layout on a monitor in landscape orientation will display a total of four series, where three series will be on the left of the window and one series on the right.
- Click OK.
-
To change the series layout by using keyboard shortcuts, press the corresponding key.
The layout of rows and columns will be set automatically to suit the aspect ratio of the application window.
Key
# of Series
Possible Layouts
1
1
1 x 1
2
2
1 x 2, 2 x 1
3
3
1 x 3, 3 x 1
4
4
1 x 4, 2 x 2, 4 x 1
5
6
1 x 6, 2 x 3, 3 x 2, 6 x 1
6
9
1 x 9, 3 x 3, 9 x 1
7
12
1 x 12, 2 x 6, 3 x 4, 4 x 3, 6 x 2, 12 x 1
8
16
1 x 16, 2 x 8, 4 x 4, 8 x 2, 16 x 1
9
18
1 x 18, 2 x 9, 3 x 6, 6 x 3, 9 x 2, 18 x 1
In a multiple-monitor configuration, the keyboard shortcuts control how the series will appear on all monitors—not just the currently selected monitor.
The viewports are updated to reflect the new layout.

To change the image layout:
-
- To change the image layout for a series in a viewport
that is displayed across several monitors, click the Image Layout tool
 or the Global Monitor Layout tool
  .
. - Select Image Layout.
-
Click the required layout icon.
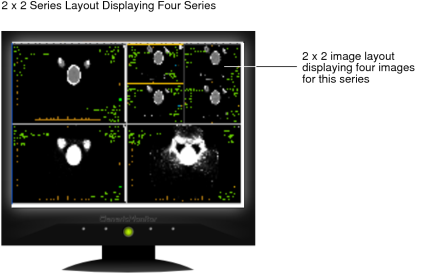
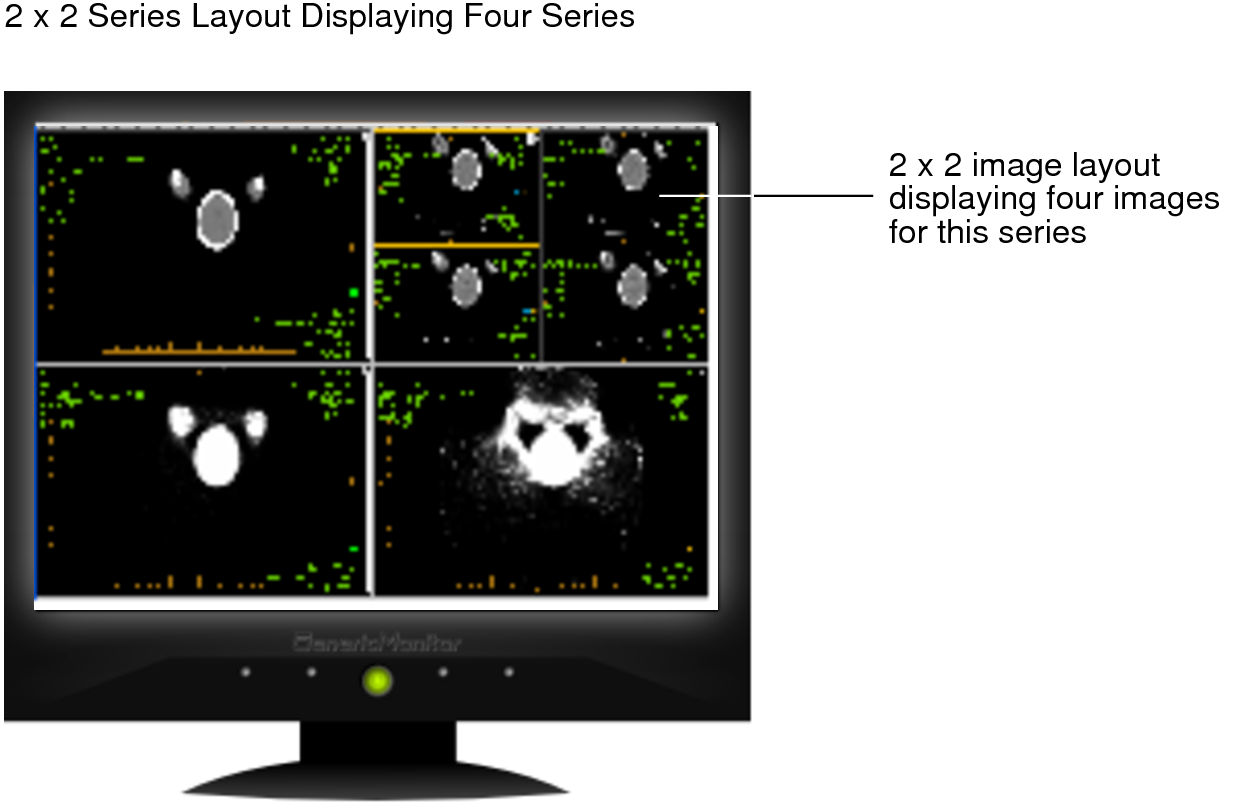
The icons indicate the way in which multiple images in a series will appear on screen, organized in columns and rows. For example, a 2 x 3 layout will display a total of six images in the series viewport, organized in two rows and three columns.
- Click OK.
-
To change the image layout for a series in a viewport that is displayed on the current monitor, use keyboard shortcuts and press the corresponding key.
The layout of rows and columns will be set automatically to suit the aspect ratio of the application window.
Key
# of Images
Possible Layouts
Ctrl+1
1
1 x 1
Ctrl+2
2
1 x 2, 2 x 1
Ctrl+3
3
1 x 3, 3 x 1
Ctrl+4
4
1 x 4, 2 x 2, 4 x 1
Ctrl+5
6
1 x 6, 2 x 3, 3 x 2, 6 x 1
Ctrl+6
9
1 x 9, 3 x 3, 9 x 1
Ctrl+7
12
1 x 12, 2 x 6, 3 x 4, 4 x 3, 6 x 2, 12 x 1
Ctrl+8
16
1 x 16, 2 x 8, 4 x 4, 8 x 2, 16 x 1
Ctrl+9
18
1 x 18, 2 x 9, 3 x 6, 6 x 3, 9 x 2, 18 x 1
When the selected viewport is displayed across several monitors, the shortcuts control how the images will appear on the current monitor, rather than across all screens, like the layout dialog.
The images in the selected series are displayed according to the new layout.
To create a custom series or image layout: