Organizing Study Tags with Events
 Watch the video
You can put study tags in calendar events. You can create your own events or share events with other IntelePACS users. An event may contain any number of study tags, including none.
Events for study tags appear in the Events tab of the Study Tag tab and the Save Study Tag dialog. The tab displays only the events for the date that you choose in the calendar. They are ordered alphabetically.
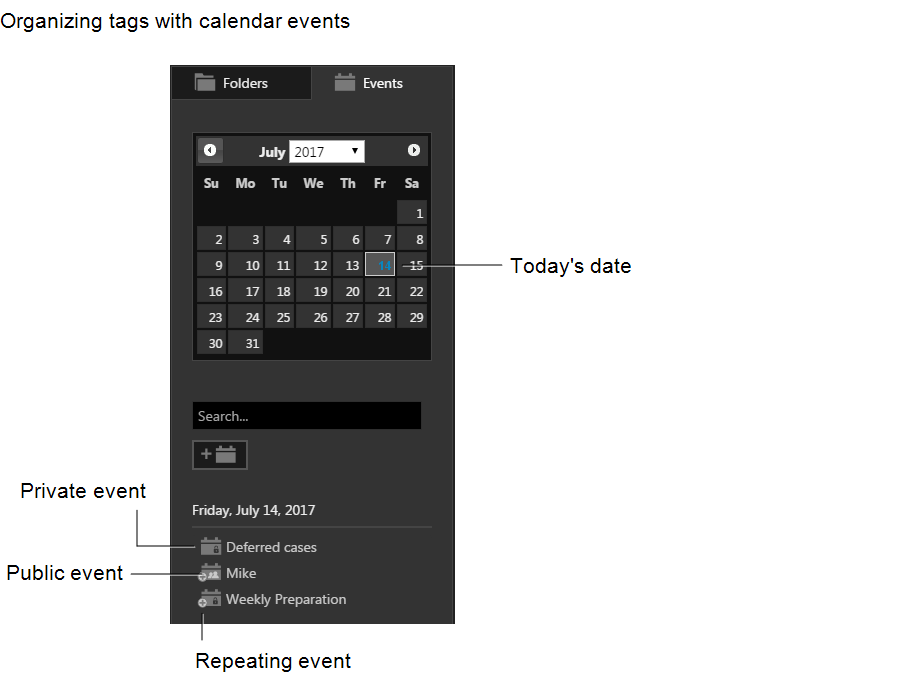
You can create an event that occurs once or repeats at an interval you choose.
Events can be private or public. Only you may create, search for, view, and organize the tags in your private events. You can search for, view, and organize the public events that you and other users create.
If there are too many public events shared among many users, you can manage these events by following a convention that everyone agrees to. For example, you can name public events by subject matter, audience, sub-specialty, or the name of the user.
To create an event:
- In the Save Study Tag dialog or Study Tag tab, click the Events tab.
- Click
 .
. -
Enter the name of your new event.
The event name may contain up to 50 characters.
- To specify the date for your event click
 then navigate to and click the desired date.
 -
To create a recurring event, choose from Frequency then choose the Start Date and End Date.
For events that repeat weekly, you can also choose the days of the week when the event occurs.
- Specify whether the event is private or public.
- Click Save.
To edit an event:
- Find the desired event. See Searching for Study Tags.
-
Right-click the event and choose Edit.
The Edit Event dialog appears.
-
If this is a recurring event, choose whether you want to edit the current event or all repeating events.
To edit the name or end date for a recurring event, choose all recurring events.
-
To specify a new name, edit Event Name.
You cannot edit the name of a single instance of a recurring event.
-
To specify a new start date for your event, click
and then navigate to and click the desired date. You cannot specify a new start date for past events.
- To modify the End Date of a recurring event, click then navigate to and click the desired date.
- Click Update.