Creating Reading Steps
You use the Step Editor to create the reading steps that indicate the way in which multiple series will appear on screen. Once created, the reading steps are stored in the Step Library.
The Step Library has private steps and shared steps. The library is segregated on whether or not a reading step contains priors.
To create a reading step:
-
In the Sequence Protocol Manager, click the Steps tab.
The Step Library appears. By default the With Priors tab is selected.
-
Click New.
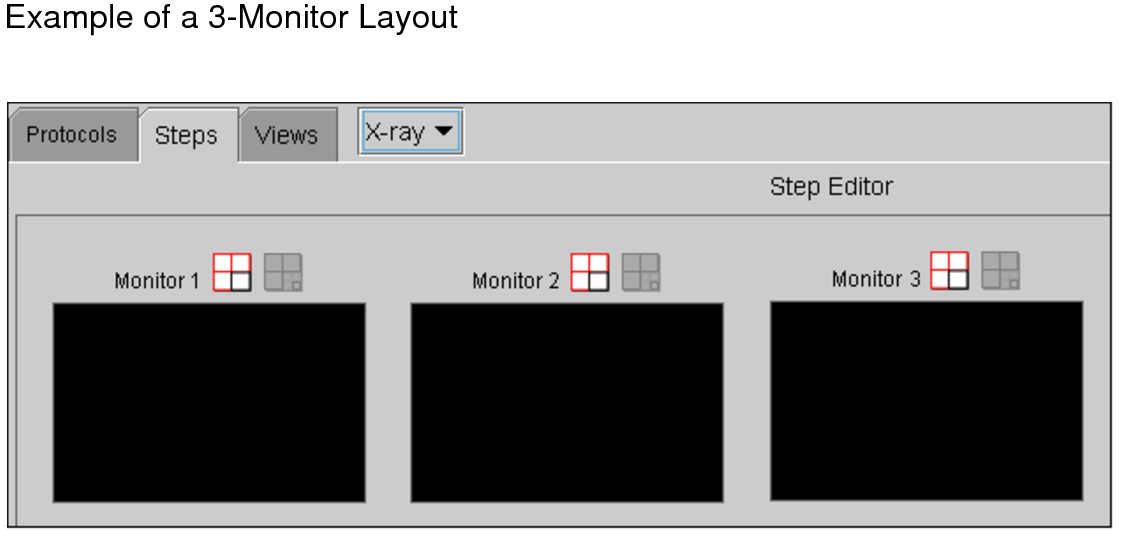
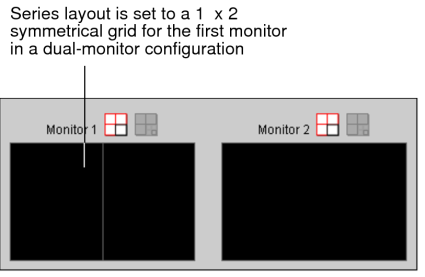
The Step Editor appears providing a default 1 x 1 series layout for every monitor detected on your workstation, up to a maximum of six monitors. This number may not correspond to the physical monitors connected to your workstation. The monitor layouts that appear in the Step Editor are based on the layout profiles stored on the IntelePACS server for your workstation and user name. When you log in to InteleViewer, the system automatically detects the number of monitors used for viewing images and selects the appropriate layout profile. For example, if the system detects three monitors for viewing images, then InteleViewer selects the 3-monitor layout and you will see three monitor icons. For more information on layout profiles, see About Roaming User Profiles.

-
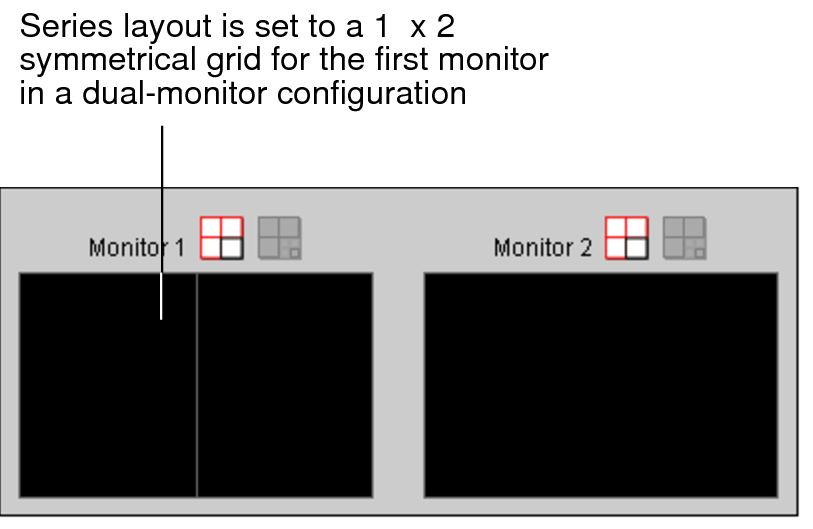
To change the series layout, click the Current Monitor Layout tool
 of
the target monitor icon.
of
the target monitor icon. The Monitor Series Layout dialog appears.
-
Click the required layout icon, and then click Save.
The target monitor icon indicates the way in which multiple series will appear on screen, organized in rows and columns. For example, a 1 x 2 layout will display a total of two series on a particular monitor, organized in one row and two columns.
If you choose an asymmetrical series layout, the viewports change position depending on the shape of the window. For example, a 3 + 1 layout will display three viewports to the left of the window and one viewport to the right of the window for a landscape monitor orientation. For a portrait monitor orientation, three viewports will display at the top of the window and one viewport at the bottom of the window. For more information on series layouts, see Changing the Viewport Layout.
-
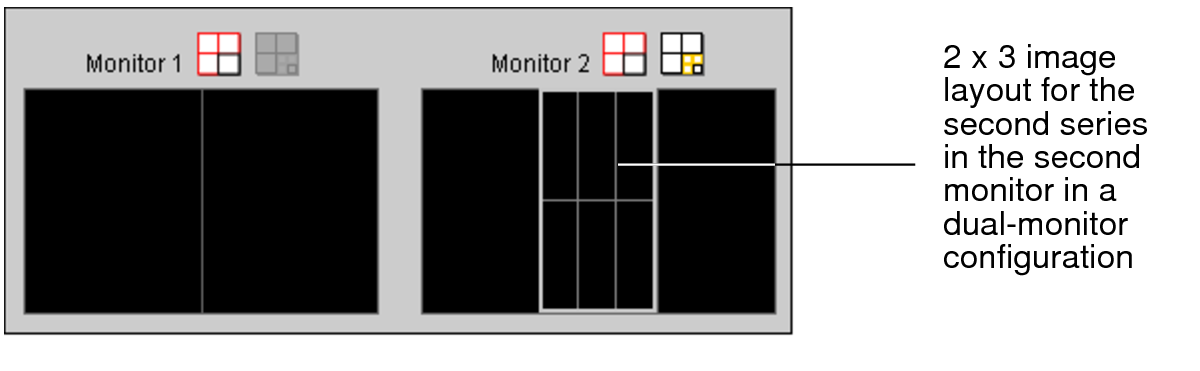
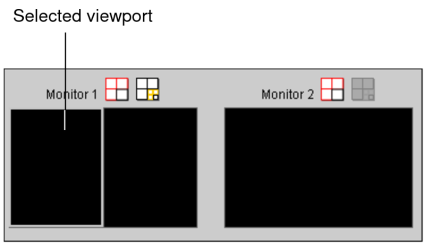
To set the image layout, click a viewport to select it.
The selected viewport is highlighted.
-
Click the Image Layout tool
 .
.The Image Layout dialog appears.
-
Click the required layout icon, and then click Save.
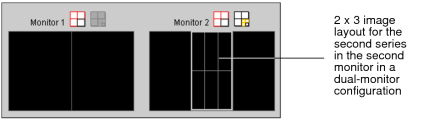
The selected viewport in the target monitor icon indicates the way in which multiple images will appear in the series viewport, organized in rows and columns. For example, a 2 x 3 layout will display a total of six images in the viewport, organized in two rows and three columns.
-
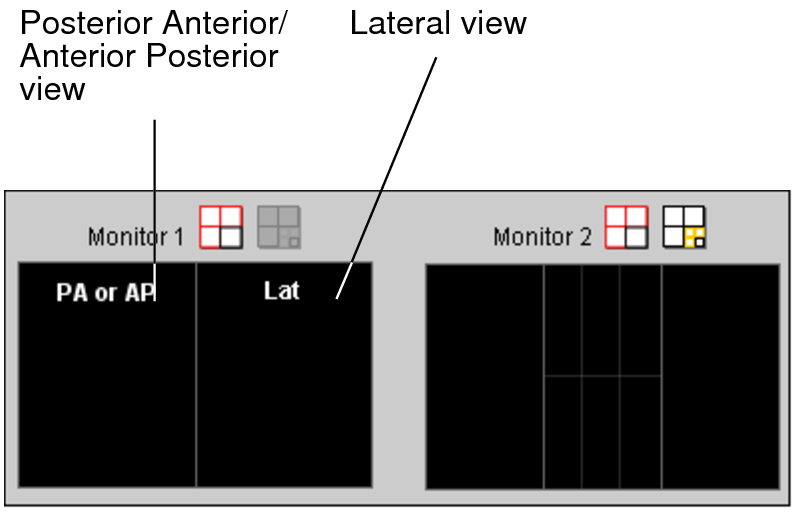
To add a view to the viewport, drag the view from the View Library to the viewport in the required target monitor icon in the Step Editor Preview panel.
You cannot drag a view with a 2 x 2 or 3 + 1 reformat to a target monitor icon without a 1 x 1 series layout.
If you cannot find the required view in the View Library, you can create a new view. See Creating Views in the Sequence Protocol Manager.
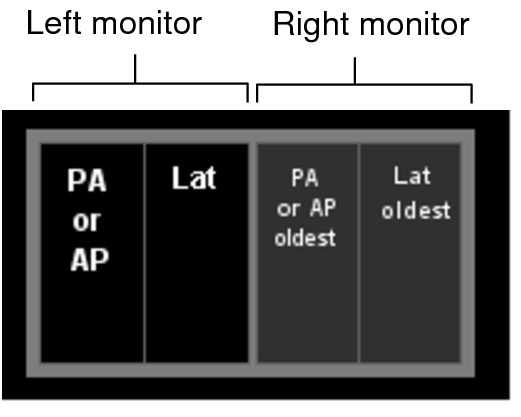
The text displayed in the viewport corresponds to the type of view that will appear in the viewport. For example, a 1 x 2 series layout can display a series with Posterior Anterior or Anterior Posterior images in the left half of the left monitor and a series with lateral images in the right half of the left monitor.

You can drag and swap views in the target monitor icon as required.
You can also choose to keep a viewport blank. A blank viewport will not display a series, but the message “Empty view in protocol” will appear.
-
To indicate that a view is required, select the view in the Step Editor, and then in the Basic tab of the View Details section, enable Required.
If a reading step includes a required view, it will appear only if that view exists. InteleViewer displays unsupported views as part of the Other Images reading step in the Protocol Preview pane.
An asterisk (*) appears in the bottom right-hand corner of a reading step (in the applicable view) that has been marked required.
-
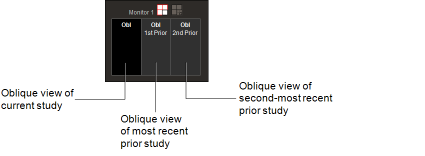
To specify whether the series appearing in the viewport should come from the current or prior study, choose one of the following options: Current (the default), Prior Number, Months Old, Most Recent, or Oldest Prior.
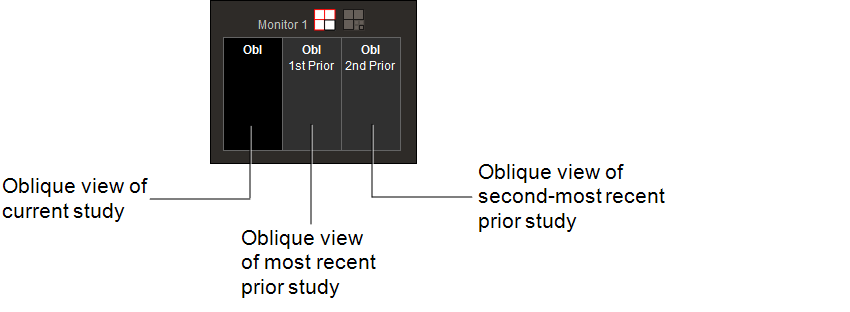
For example, you can create a reading step that will show three series: the axial view of the current study, the axial view of the most recent prior study, and the axial view of the second-most recent prior study.
If you choose the Prior Number or the Month Old option, click the up-arrow button or down-arrow button to set the desired value. You can also enter the required number. For example, if you select or enter “3” for the Prior Number option, then the third-most recent prior study will appear in the viewport.
You can identify the series by the background color of the viewport in the monitor icon. A black background indicates a current study and a shaded background indicates a prior study: The text displayed in the shaded viewport indicates the chronological order of the prior study from most recent to oldest with respect to the current study.
This text:
Indicates this prior study:
1st Prior
Most recent prior.
<number> Prior
“2nd Prior” is the second-most recent prior, “3rd Prior” is the third-most-recent prior, “4th Prior” is the fourth-most recent prior, up to a value of 25.
<number> Month Old Prior
The number of months that the study is old relative to the current study, including priors that occur 30 days before and 30 days after the current study. For example, if you enter “12” for the Month Old option, then the 12-months old prior study will appear in the viewport if available. Otherwise, an 11-months old or 13-months old prior study will appear instead.

Most recent (which could include an image from the current or prior study).
Oldest Prior
Oldest prior.
-
To set display options, click the Display Options tab, and do the following:
- Enable the Enable Display Options check-box.
- Select the desired options for the various fields. Refer to Series Display.
If you have enabled these options, an eye icon appears in the lower right-hand corner of a reading step for the applicable view. The icon is also visible for those same reading steps in the Protocol Preview panel.
- Add views to the viewport as required.
-
Repeat steps 3 to 12 for each monitor layout.
In this example, the reading step includes a posterior-anterior view and a lateral view of the current study in the left monitor, and a posterior-anterior view of the oldest study and a lateral view of the oldest study in the right monitor.

Skip this step if you want the series view layout of the first monitor to span across all monitors once the step is applied. In this case, enable Stretch the First Monitor’s Layout Over all Monitors.
-
In the Step Editor, click Save.
The reading step is saved in the Step Library as a private reading step and appears in the Private panel with a highlighted outline.To share your reading step with other users, see Sharing Sequence Protocols.