Guidelines for Creating Sequence Protocols
When creating sequence protocols, you should follow these guidelines.
Determine the layouts. How will images be laid out? Which images should be shown side-by-side? In what order should images be shown?
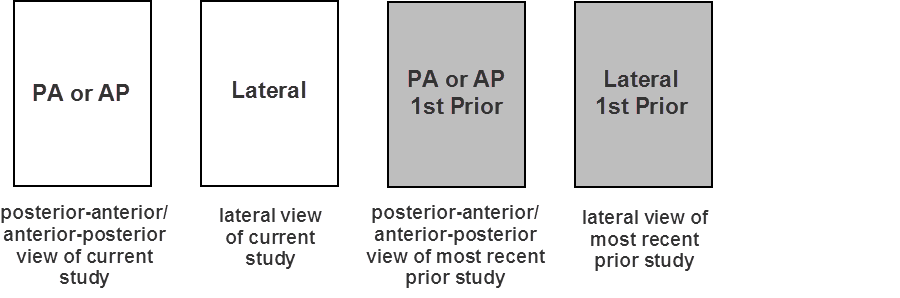
View the study description to look at which views are contained in a study. For example, a “Chest 2 Views” study can have the following four views:
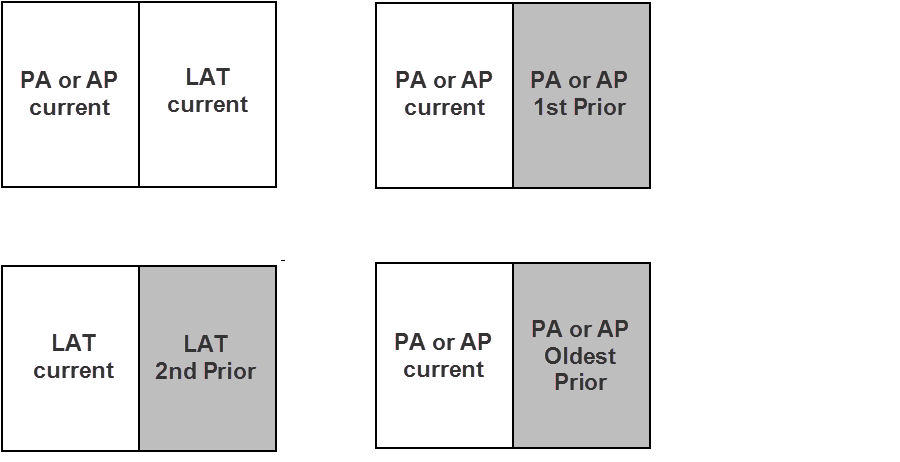
Choose how you want to arrange views for each monitor. For example, on a dual-monitor configuration, you may want to display the following layouts for the “Chest 2 Views” study:
Survey your use cases. How many images should be displayed simultaneously on your workstation? Would you like to keep one viewport blank? Is there a sequence of images taken at different times? Are there multiple images taken during a single test? If so, can images from different parts of the body be arranged in a way that preserves those spatial relationships? For example, if you are showing images from the right and left sides of the body, place the left image to the left of the right image.
Specify the remaining details for the sequence protocols. For example, images in a time series should be shown left to right, oldest to most recent.
Create a sequence protocol for procedures that contain a large number of series or when their diagnosis involves a lot of comparisons with prior studies.
Define as many specific sequence protocols as you can, and resort to general or fallback sequence protocols for all others. You should create at least one fallback sequence protocol for each modality type, like “CT ABDOMEN”.
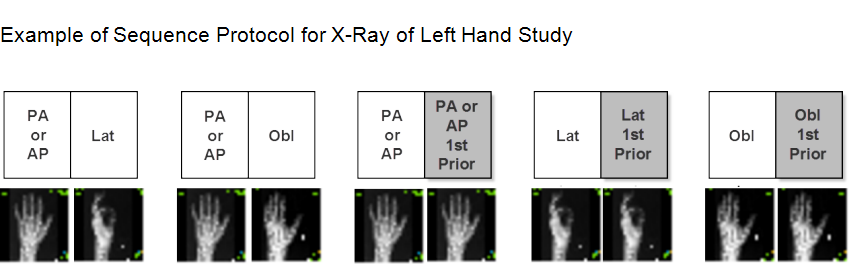
Create specific sequence protocols for studies for which you can reliably set up series matching. For example, you could create a sequence protocol with the following reading steps for viewing an X-ray of the left hand. The sequence protocol assumes that the X-ray study includes three series, each with one image.
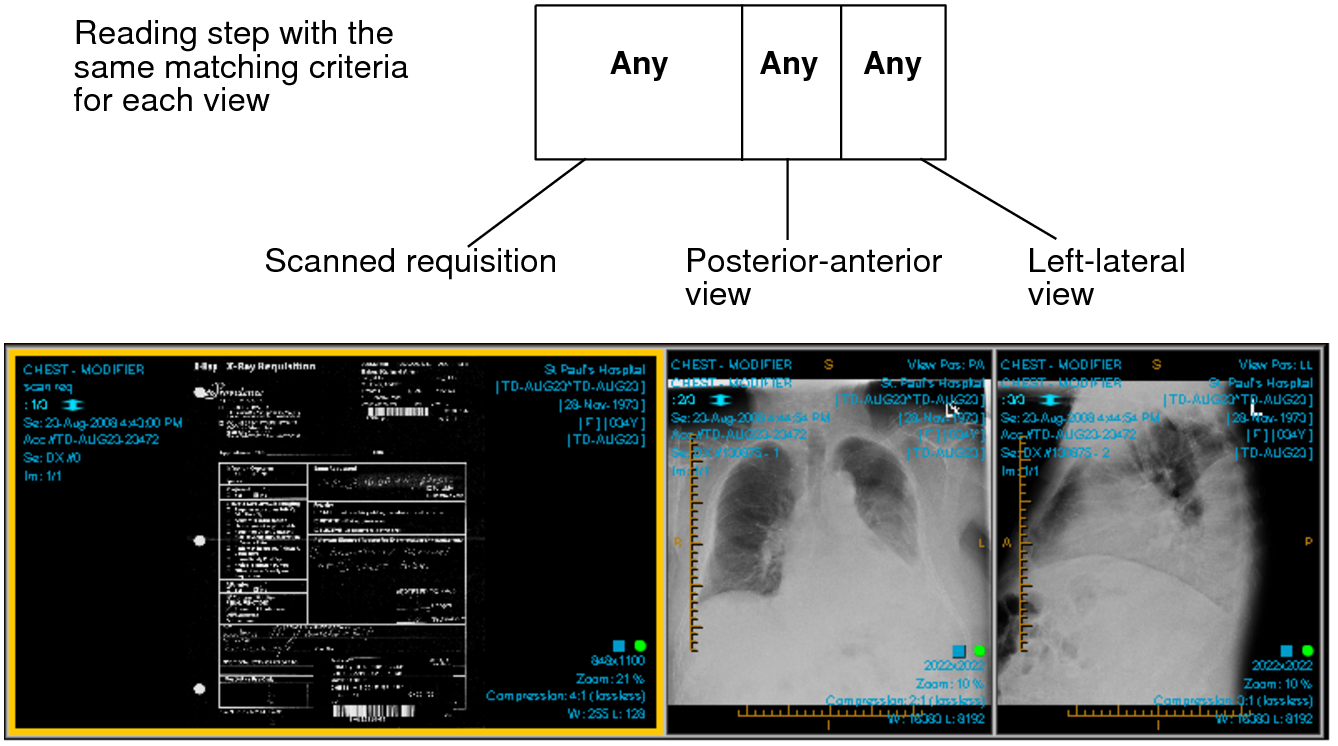
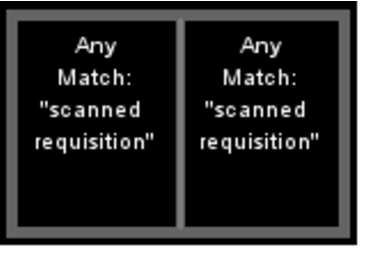
Create an “Any” view, where all the input matching rules are set to Any, to indicate that no matching criteria is required and any unmatched series can be assigned to the viewport location. This is useful if you want to display particular images (such as, localizer or scout images or modality screenshot images), scanned requisitions, or other paper forms in a reading step instead of the Other Images reading step. For example, to compare two scanned requisitions side-by-side, you can create a reading step with two Any views, where each contains “scanned requisition” in the series description.
Create a sequence protocol with the same views repeated several times in the same reading step so InteleViewer can lay out all the images side-by-side in the viewports. For example, a DX series may contain a scanned requisition and two images (the posterior-anterior view of the chest, and the left-lateral view of the chest) in a dataset. To display all images side-by-side in the viewports, you could create a reading step with three “Any” views that have no series description matching criteria. In this way, the views will match all images. Each image will appear in the viewports without any duplication of the images being displayed in the reading step.