Exporting Images as Video
Your can export images into either Audio Video Interleave (AVI) file format or MP4 file format for viewing in your preferred video player or for inclusion in presentation slides.
To view, record, convert and stream the video, FFmpeg.exe must be installed on your workstation. For more information, see your PACS administrator.
To export images as video:
- Select the required image by clicking its viewport.
-
From the main menu, choose File | Export Movie.
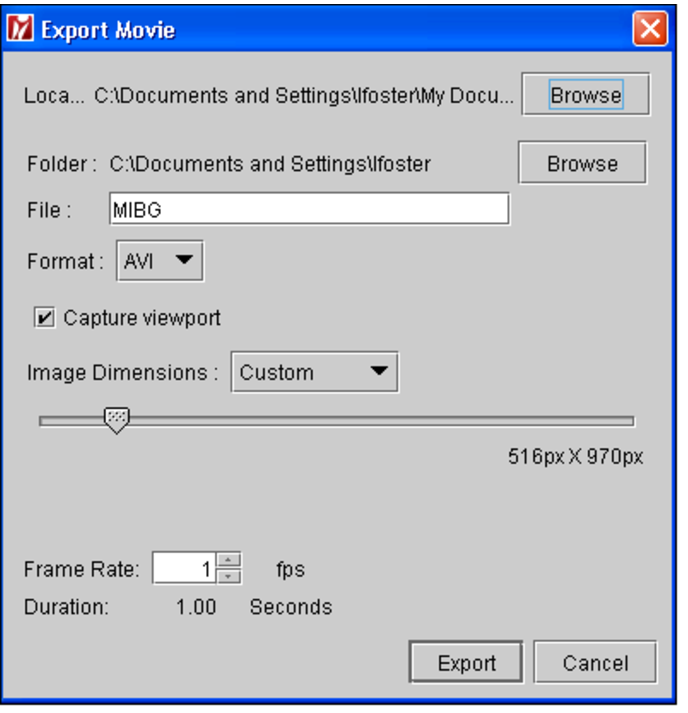
The Export Movie dialog appears. If the ffmpeg.exe path is not set, options in the Export Movie dialog are disabled.
-
To set the path to the executable, click Browse and then locate the ffmpeg.exe in your folders.
The path to the executable is set and the Export Movie dialog options are enabled.

-
Configure the export movie settings, as required:
Option:
Description:
Location
Sets the location of the ffmpeg. exe file.
Folder
Sets the location where the movie is saved. Click Browse, navigate to the folder in which you want to save the movie and then click Select Folder.
File
Sets the file name. By default, the file name is the same as the study description.
Format
Exports the movie in either AVI or MP4 format.
Capture Viewport
Exports the image as it is displayed in the viewport, including any zooming, window levelling, text overlay, image overlay, and so on.
Image Dimensions
Sets the visual characteristics of the movie images. If you select From DICOM, the DICOM dimensions are applied. If you select Custom, use the slider to set the image dimensions.
Frame Rate
Sets the image frequency, that is, the frames per second (FPS). If you are viewing Cine images, you can select From DICOM to use the DICOM settings or you can select Custom to set the frames per second. The duration time updates as you change the frame rate.
These settings are saved and applied automatically to subsequent exports. You can however, change the settings again at any time.
-
Click Export or press Enter.
The movie is saved in the folder you specified in your export settings.