Measuring Volumes
Use the Volume of Interest (VOI) measurement tool to draw regions of interest across multiple images in a series and calculate the total volume, in cubic centimeters, of the regions.
This tool functions similarly to the Region of Interest (ROI) tool to draw freehand selections of areas on an image. You can also select a region and delete it. Deleting a region does not delete the entire volume.
InteleViewer calculates volume by multiplying the area of the region of interest that you select on an image by the distance between the image and its neighboring image. The series must contain a minimum of two images in which their planes are parallel and have the same separation distance. Images separated by a gantry tilt or by irregular separation distances are not supported. Also, the series must contain calibration data from the scanner. InteleViewer measurement calibration does not activate this tool on images that do not contain scanner data.
To make a new volume measurement:
- Click the Volume of Interest Measurement tool
 .
. -
Select New Volume at the top of the active viewport.

-
Click and hold the left mouse button while dragging an outline of the area you want to select in the first image. Release the mouse button when you are finished.
Your selection closes between the start and end points. A numbered region beginning with “V” appears on the image and in the list at the top of the viewport. Also at the top of the viewport, the Add option is selected automatically.
-
Navigate the stack to another image and repeat steps 2 to 3.
You do not have to draw regions in consecutive images.
When you have selected areas in two or more images the corresponding volume measurement appears in the bottom left corner of the viewport.

To change the size of a volume of interest measurement:
-
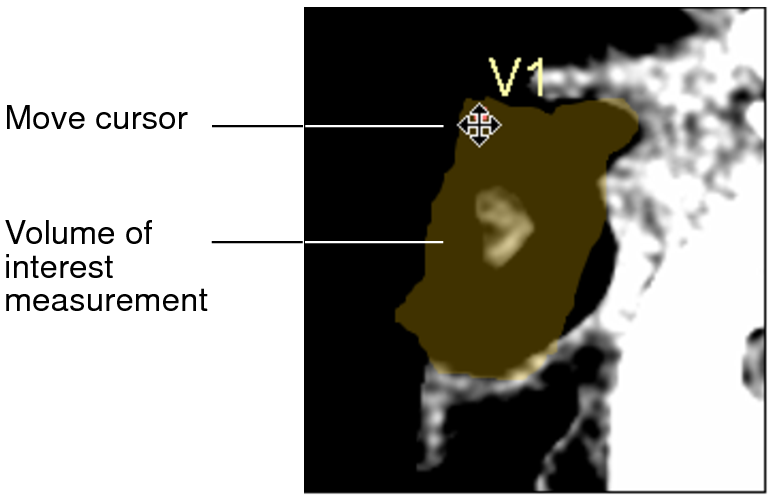
Click the number associated with the volume of interest measurement to select it.
The region is highlighted and the move cursor appears.

-
To add to or subtract from your selection, select Add or Subtract, respectively, at the top of the active viewport then click and drag an outline of the area you want to add or subtract.
The volume measurement updates to reflect your changes.
- Navigate the stack to the next image and repeat steps 1 and 2.
To move a volume of interest measurement:
- Select Move at the top of the active viewport.
-
Do one of the following:
- Move the mouse pointer to the measurement you want to manipulate, and click to select it.
- From the menu, select the measurement you want to manipulate (for example, V2), and move the mouse pointer over the highlighted measurement.
The region is highlighted and the move cursor appears.
If you move the mouse pointer outside the highlighted measurement, it will return to a mouse cursor—and you can add to your selection.
- Drag the selection to a new location.
- To move the label of the measurement only, click the label so that the move cursor appears, and then drag the label.
- Navigate the stack to the next image and repeat steps 1 to 4.