Synchronizing Stacking
You can synchronize the stacking of multiple series that were imaged on parallel planes by using Linked Stacking. Two linked stacking tools are available: Manual Linked Stacking and Auto Linked Stacking, and the Auto Linked Stacking tool is selected by default.
Use the Auto Linked Stacking tool to cause all series on parallel planes, which share a unique coordinate system, to synchronize to the same real-world position and remain linked during stacking. This applies to the entire viewing area; therefore, any stacking performed in any plane links all other similar planes, until you choose a different mode or disable the Auto Linked Stacking mode. With the Auto Linked Stacking tool, the reference position is the center of the selected image.
Use the Manual Linked Stacking tool  to
cause all series on parallel planes to link to the same real-world
position and remain linked during stacking. For example, if the images
in the selected series are 4mm apart, all linked series stack by
4mm in the same direction. If there is no image at that location,
a blank screen appears. Since the Manual Linked Stacking tool ignores
the coordinate system of a study, you can stack within a study (such
as a PET/CT that does not properly unite series with a single unique
coordinate system), as well as across studies (such as priors).
to
cause all series on parallel planes to link to the same real-world
position and remain linked during stacking. For example, if the images
in the selected series are 4mm apart, all linked series stack by
4mm in the same direction. If there is no image at that location,
a blank screen appears. Since the Manual Linked Stacking tool ignores
the coordinate system of a study, you can stack within a study (such
as a PET/CT that does not properly unite series with a single unique
coordinate system), as well as across studies (such as priors).
Linked stacking works in conjunction with the Stack tool, and images are synchronized when you use the Cine and Image Scroller tools. To automatically synchronize images when you use any of these tools, simply leave this feature active while you work.
You cannot use the Linked Stacking tools to synchronize the stacking of multiple cine series that were imaged on parallel planes.
Before you begin, choose the current linked stacking tool. This tool is used by default, until you choose a different one or disable the tool.
To choose the current linked stacking tool:
-
Do one of the following:
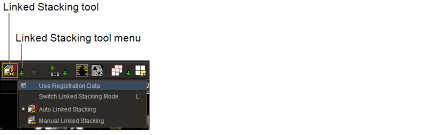
- Click the Linked Stacking Tool menu in the toolbar.
- Right-click in the viewport, and click the Stack tool in the radial menu.
-
Select the required tool.
Choose:
To use:

The Auto Linked Stacking tool

The Manual Linked Stacking tool
The icon updates to reflect the selected tool.
You can also press L to cycle through the linked stacking tools.
- To disable the tool, click the selected tool again in the radial menu or the toolbar.

To synchronize stacking:
-
Open all of the series that you want to stack.
You can also stack key image series and teaching cases when viewing them, but you cannot stack in the Key Image Composer and Teaching Case Editor.
- Choose the stack tool. See Stacking Images.
-
Stack each series so that the corresponding images are displayed.
If you are using a multi-image layout, make the first image in each series correspond.
- Select the series (or plane) with which you want the others to synchronize.
-
Click the Auto Linked Stacking tool
 .
.The cursor corresponds to the linked stacking tool you have selected, and the Auto Linked Stacking icon in the toolbar appears with a yellow outline indicating that it is the currently-selected tool.
-
Stack images using the mouse or keyboard shortcuts. See Stacking Images.
When you stack by dragging your mouse cursor, the Auto Linked Stacking icon disappears, for optimal viewing of the images.
If you are displaying the text overlay information, the image number increases and decreases as you stack to indicate the current image of each series.