Creating Sequence Protocols Using the Sequence Protocol Manager
You can create and maintain sequence protocols by using the Sequence Protocol Manager. When creating a sequence protocol, you specify the number of viewports per monitor and the number of images per viewport, as well as set the options for the study. Make sure to create and activate sequence protocols (which are activated by default) before opening a study to ensure proper sequence protocol matching.
To use this feature, ask your PACS administrator to enable the Advanced Layout Management privilege (for non-mammography studies) or the Mammography Features privilege (for mammography studies) in your user account.
To create a sequence protocol:
-
Choose Utilities | Show Protocol Manager.
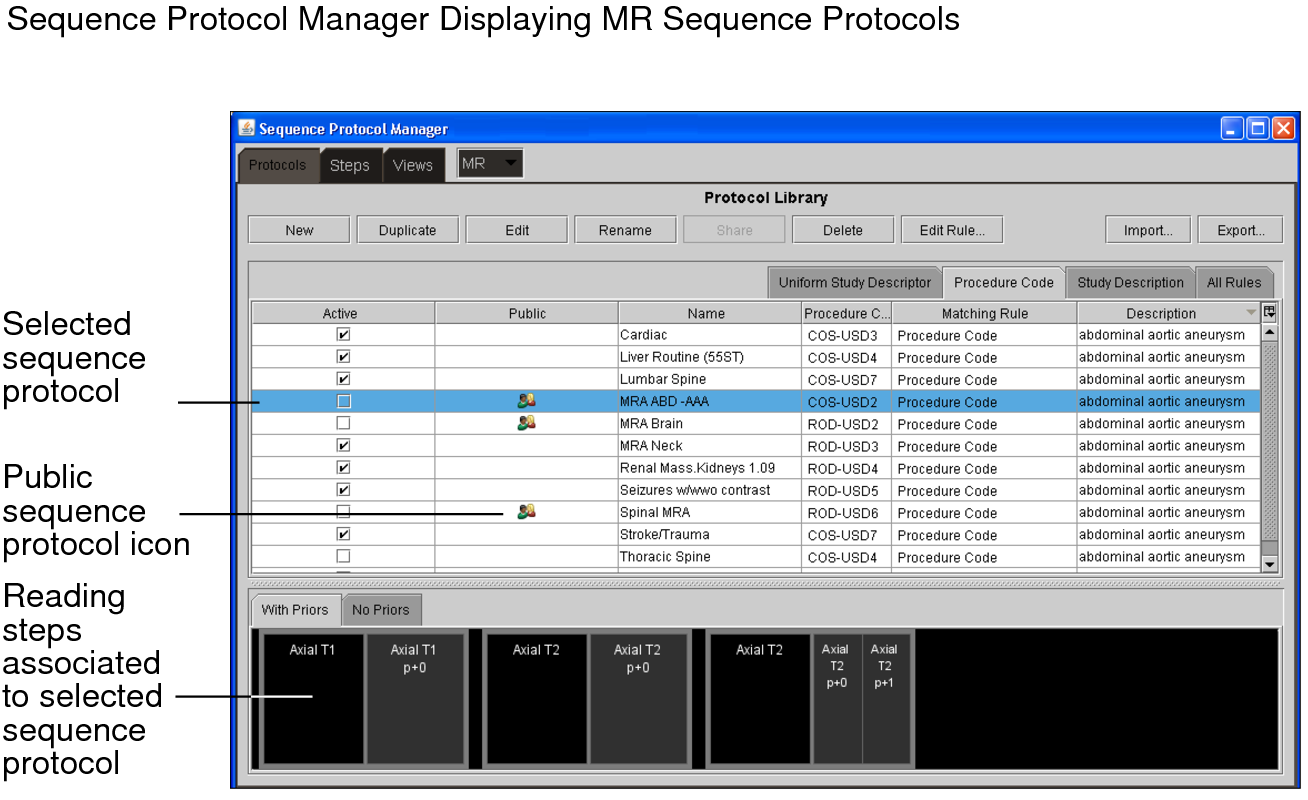
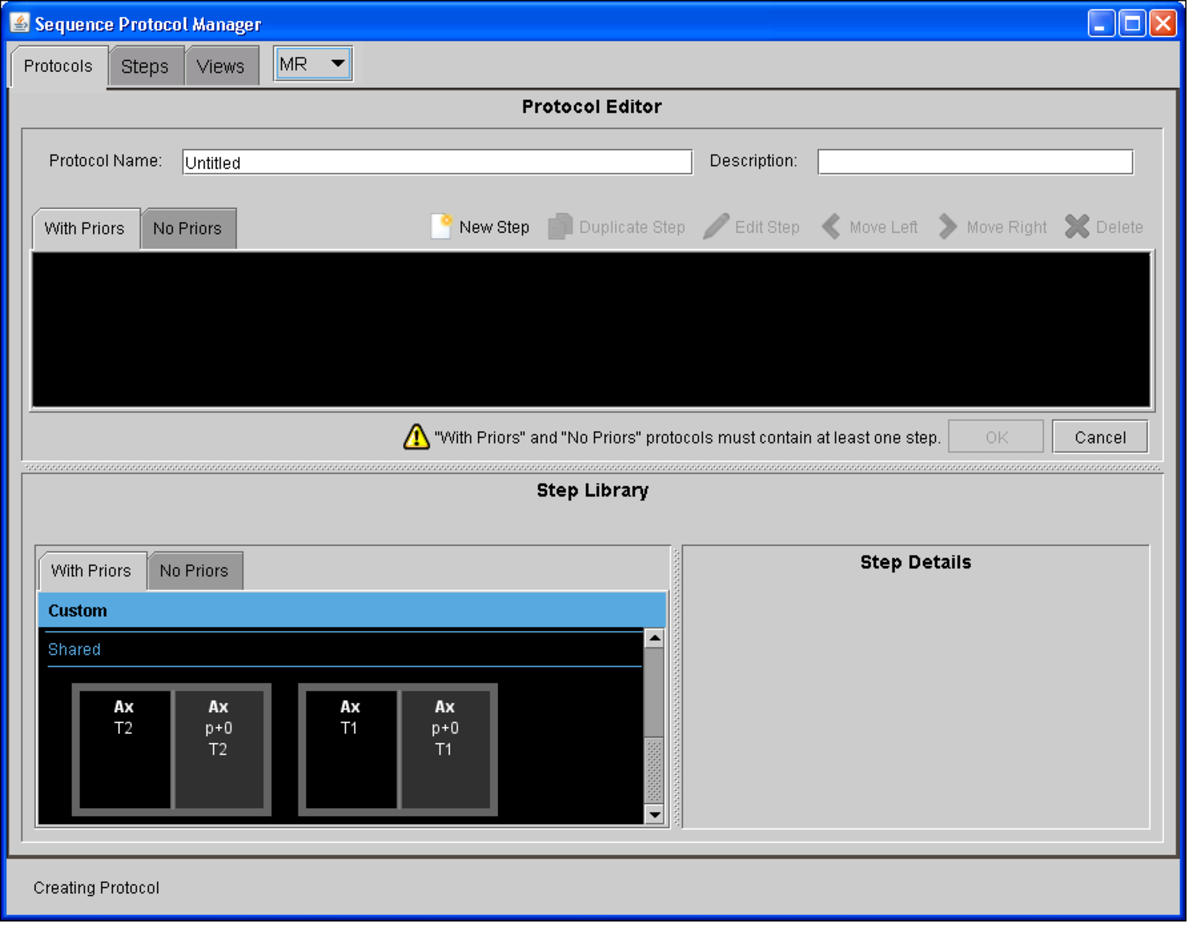
The Sequence Protocol Manager appears. By default the Protocols tab is active.
-
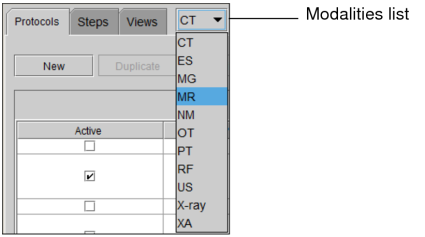
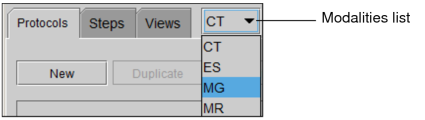
Click the Modalities list and choose a modality.
-
Click New.
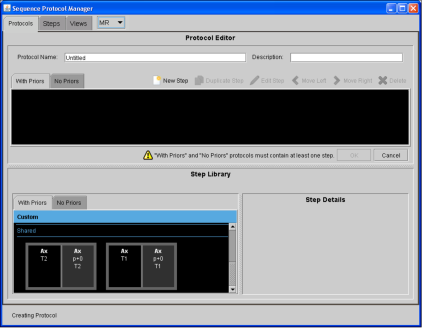
The Protocol Editor appears. By default, the With Priors tab is active.
-
In the Protocol Name field, enter a descriptive name for the sequence protocol that will clearly identify it.
The protocol name will appear on the Sequence Protocols panel. The name must be unique and can contain alphanumeric characters, spaces, and dashes. If you want to export the sequence protocol, make sure the name does not contain the following restricted characters: backward slash (\), forward slash (/), colon (:), asterisk (*), question mark (?), quotation mark (“), less-than sign (<), greater-than sign (>), and vertical bar (|).
- In the Description field, enter a description for the sequence protocol.
- To add a reading step to your sequence protocol, drag a reading step from the Step Library to the Protocol Preview panel.
-
To create a new reading step, do one of the following:
- To create a new reading step in the Step Library, see Creating Reading Steps.
- To create a new reading step in the sequence protocol, click New Step and follow steps 3 to 13 in Creating Reading Steps.
Keep in mind that you cannot share reading steps stored in the sequence protocol.
- Add additional reading steps, as required.
-
To rearrange the order of your reading steps in the sequence protocol, do one of the following:
- Press the Move Left or the Move Right buttons.
- Drag the reading step to a new location.
- To create readings steps for studies with no priors, click the No Priors tab in the Protocol Preview panel and the No Priors tab in the Step Library. Repeat steps 6 and 7.
- To copy a reading step in the sequence protocol, select the reading step, and then click Duplicate Step.
- To edit a reading step in the sequence protocol, select the reading step, and then click Edit Step.
- To remove a reading step from the sequence protocol, select the reading step, and then click Delete.
-
Click Save.
The sequence protocol appears in the Protocols List as a private sequence protocol with the Active checkbox enabled.
- To specify the matching rules, see Creating Matching Rules Using the Sequence Protocol Manager.
- Click Close.

To create a mammography sequence protocol:
- Choose Utilities | Show Protocol Manager.
-
Click the Modalities list and choose the MG modality.
To access the MG modality from the list, your user account must be assigned the Mammography Features privilege.
-
Click New.
The Protocol Editor appears. By default the With Priors tab is selected.
-
In the Protocol Name field, enter a descriptive name for the sequence protocol that will clearly identify it.
The protocol name will appear on the Sequence Protocols panel. For each modality, the protocol name must be unique and can contain alphanumeric characters, spaces, and dashes. If you want to export the sequence protocol, make sure the name does not contain any of the following restricted characters: backward slash (\), forward slash (/), colon (:), asterisk (*), question mark (?), quotation mark (“), less-than sign (<), greater-than sign (>), and vertical bar (|).
- In the Description field, enter a description for the sequence protocol.
-
Do one of the following:
- To add a reading step to your sequence protocol, expand one of the sets of views then drag a reading step from the Step Library to the Protocol Preview panel. For example, to add a reading step for an implant, click Implant Displaced Views then drag a reading step.
- To add a smart reading step to your sequence protocol, click the Additional Views heading and then drag a smart reading step from the Step Library to the Protocol Preview panel.
You can identify a smart reading step by the shading around its border.
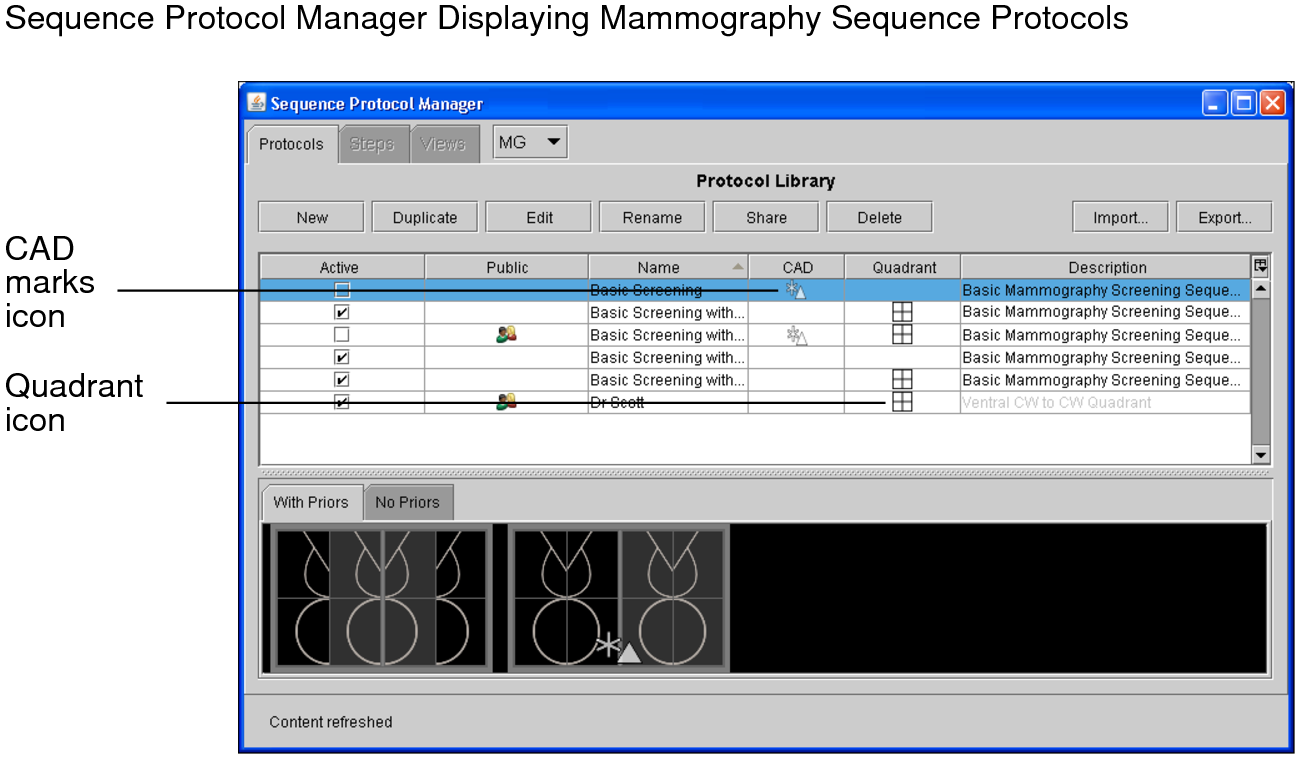
- To include CAD marks in a reading step, in the Protocol Preview panel, select a reading step, and then click CAD.
- To add the Quadrant options to a reading step, in the Protocol Preview panel, select a reading step, and then click Quadrant.
- To apply the chest wall to chest wall orientation to a reading step, that is displayed in the same orientation, in the Protocol Preview panel, select a reading step, and then click Chest Wall to Chest Wall.
- Add additional reading steps, as required.
-
To rearrange the order of your reading steps in the sequence protocol, do one of the following:
- Press the Move Left or the Move Right buttons.
- Drag the reading step to a new location.
-
Click the No Priors tab in the Protocol Preview panel and the No Priors tab in the Step Library. Repeat steps 6 to 8.
You must include a sequence of reading steps for studies with priors and studies without priors for any given sequence protocol.
- To remove a reading step from the sequence protocol, select the reading step, and then click Delete.
-
Click Save.
The sequence protocol appears in the Protocols List as a private sequence protocol with the Active checkbox enabled.
- Click Close.
