Adjusting the Window Levelling
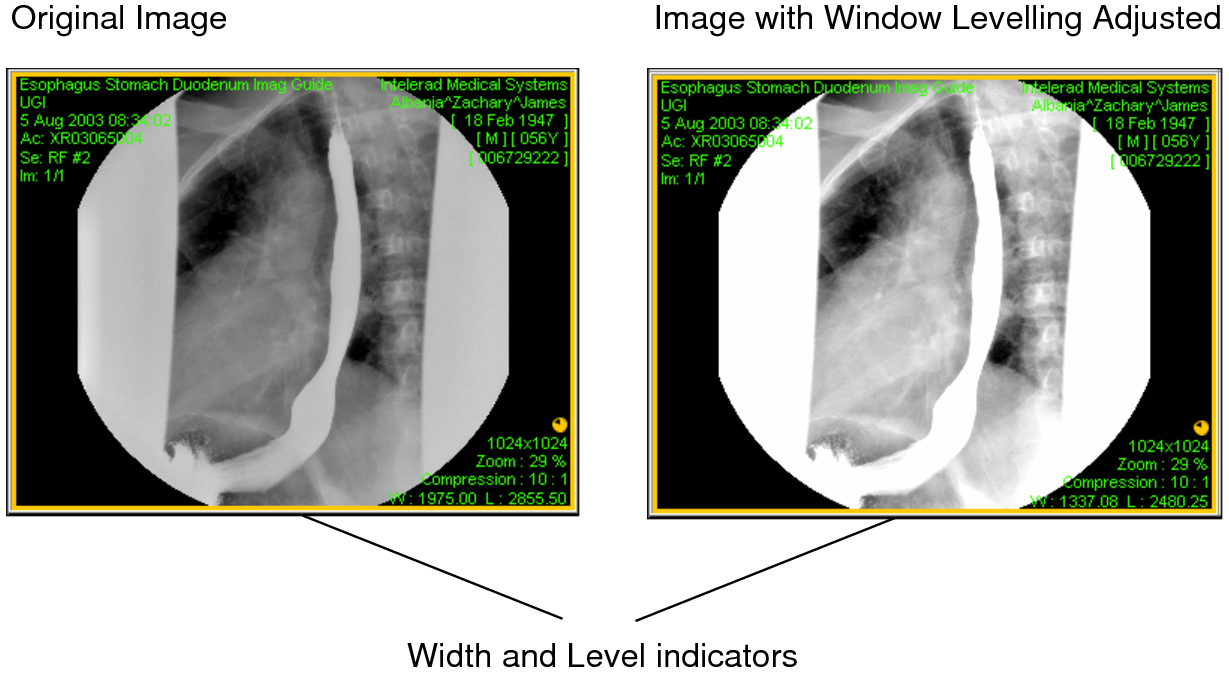
Window levelling alters the contrast (width) and brightness (level) of the selected image. You can adjust the window levelling interactively or by choosing one of the predefined settings, referred to as window level presets.
There are three types of window level presets: Manual presets are those you define manually. Automatic presets are those the system defines automatically. DICOM presets are those DICOM defines.
Manual presets are custom window level settings which are associated with a particular function key on the keyboard. Before you can use these presets, you must first define them.
Automatic presets are obtained from the DICOM image source, and can be particularly useful when viewing MR images, which may not have predictable intensity values. There are three automatic presets: Low Contrast, Medium Contrast, and High Contrast. To define these presets, the image is analyzed when it is obtained by the IntelePACS and some of the image data from top and bottom of the range of values is removed to improve the contrast, as described in the following table.
|
Preset |
Percentage removed from top of range |
Percentage removed from bottom of range |
|---|---|---|
|
Auto: Low Contrast |
1% |
1% |
|
Auto: Medium Contrast |
5% |
5% |
|
Auto: High Contrast |
10% |
10% |
Mouse-controlled window leveling can be configured by Intelerad Technical Support. Please contact the Intelerad Technical Support for more information.
DICOM presets are obtained directly from DICOM.
To interactively adjust the window levelling:
-
Select the required images.
If linked mode is set in your modality preferences, you can window level several images simultaneously. For more information see, Linking Viewports to Manipulate Images.
-
Click the Window Level tool
 .
.The cursor changes to indicate you are adjusting the window level.
-
Click and drag in the required viewport.
The Window Level tool icon in the viewport disappears to allow you optimal viewing of the image.
Drag:
To:
Up
Decrease the level setting (brightness).
Down
Increase the level setting (brightness).
Left
Decrease the width setting (contrast).
Right
Increase the width setting (contrast).
In the case of mammography images, air gap suppression is applied when you adjust the window level, so that the parts of the image not covered by breast tissue remain black.
If you display the text overlay information, the width and level indicators increase and decrease as you drag.

To use a window level preset:
- Select the required series.
-
Do one of the following:
- Press the key that corresponds to the window level preset
that you want to use. For example, press F3.
This step assumes you have already defined window level presets. For information, see “Creating Window Level Presets” in Setting Window Level Preferences.
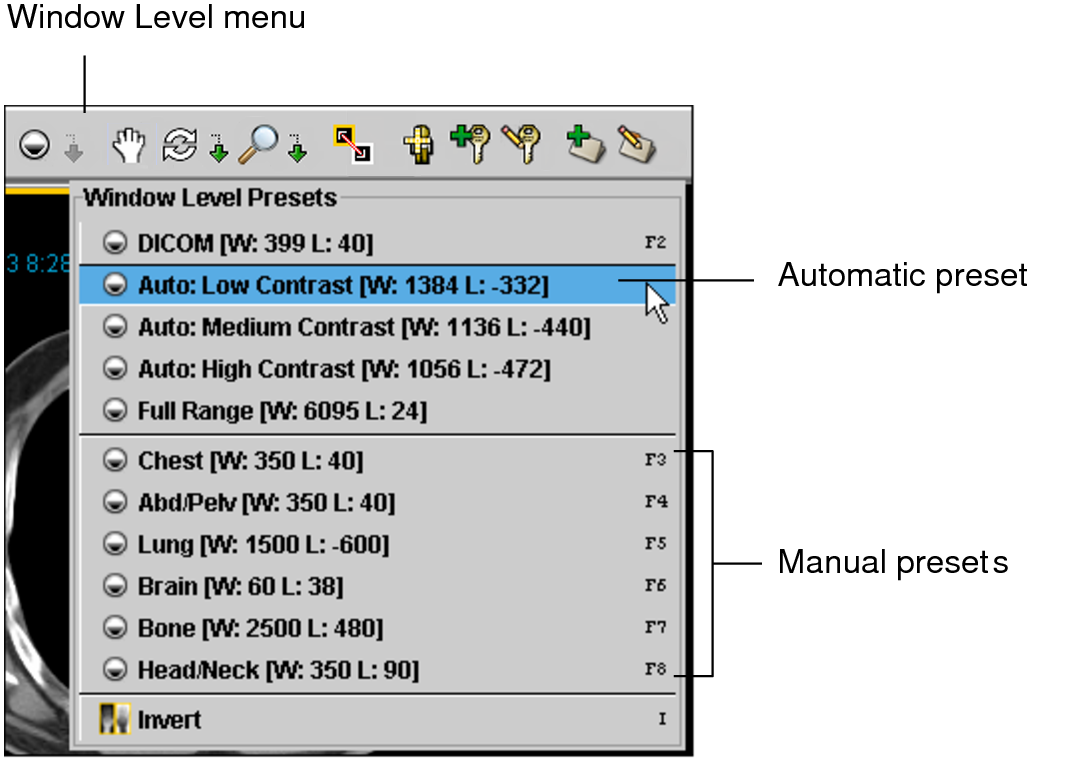
- Choose a setting from the Window Level menu.
Choose:
To:
DICOM
Set the window level to correspond to the DICOM data contained in the image.
Auto: Low Contrast
Apply a low-contrast window level setting.
Auto: Medium Contrast
Apply a medium-contrast window level setting.
Auto: High Contrast
Apply a high-contrast window level setting.
Full Range
Use the full range of intensity values contained in the image.
You can also press Ctrl+F2 to cycle through the Auto settings or press Shift+F2 to cycle through DICOM values.
The preset window level settings are applied to all images in the selected series.

- Press the key that corresponds to the window level preset
that you want to use. For example, press F3.
See Also