About Installing InteleViewer
Once InteleViewer is installed, you start the application as you would any other standard Windows application and then log in by using your IntelePACS user name and password. You can also start InteleViewer via the InteleBrowser, the web-based interface to the IntelePACS. To connect to the InteleBrowser, use the web address of the IntelePACS (also called a Uniform Resource Locator, or URL), and your user name and password. If you do not have this information, contact your PACS administrator.
Your IntelePACS user account has privileges and restrictions associated with it. They determine which features and patient information you have access to in the system and correspond to the job function that you need to perform. These privileges and restrictions are configured by your PACS administrator and are separate from your Microsoft Windows user account.
For example, a radiologist typically has access to all the features required to view studies and create and view reports, whereas a clinician is able to view reports, but not create them.
The specific configuration of your IntelePACS might vary from the examples provided in this guide.
To install InteleViewer:
-
Log in to InteleBrowser.
Your Windows account must have administrator privileges to install InteleViewer. For information, contact your system administrator.
-
In the InteleBrowser main menu, click InteleViewer.
The installation wizard launches.
- Click Next to display the InteleViewer license agreement.
-
Read and accept the terms of the InteleViewer license agreement, and then click Next.
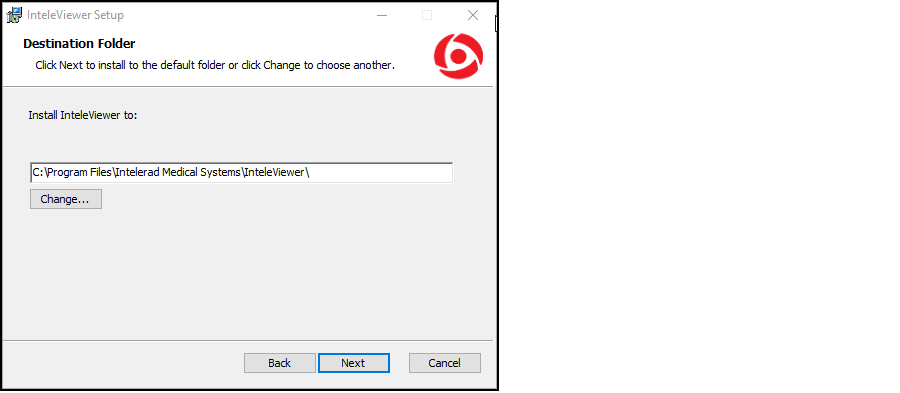
The Destination Folder window appears.
- To select a different folder in which to install the application, click Change and select the folder in the dialog that appears.
- Click OK, and then click Next.
-
Choose which users can automatically upgrade InteleViewer and the Image Fusion module when new versions are available. You can choose All Users or Administrator/Power User Only.

If you choose Administrator/Power User Only, only users with the corresponding privileges assigned to their Windows user account will be able to upgrade the application.
- Click Next.
-
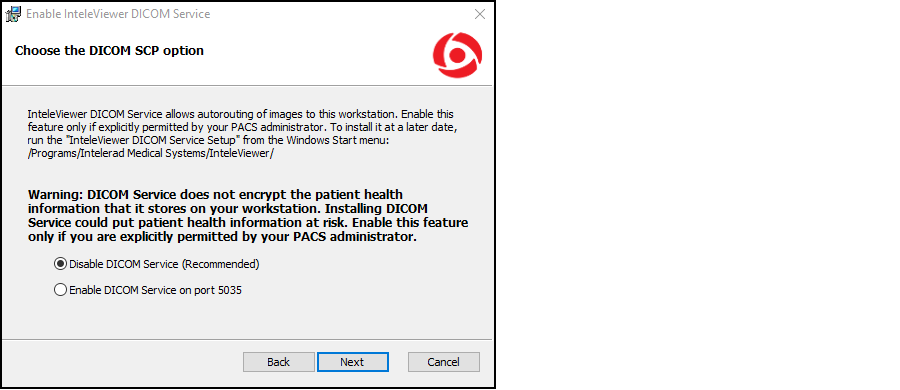
Choose whether to activate the DICOM Service.
You must install the DICOM Service to use the DICOM Query feature (if it is available on your user account) or the Mammography Viewer features (if they are available on your user account). It is generally recommended that you deactivate this option unless instructed to activate it by your PACS administrator.
InteleViewer does not encrypt the patient health information that it stores on your workstation for DICOM Service and long-term disk caching. Enabling these features could put patient health information at risk. Contact your PACS administrator before enabling DICOM Service or long-term disk caching.

This option appears only if your Windows user account is assigned Administrator privileges.
-
Choose your shortcut option.

-
Click Install.
The InteleViewer installation is complete. Click the Finish button to exit the wizard. An InteleViewer application icon appears in the programs menu and any other shortcuts you specified in the wizard.